Here is another beginner-friendly pattern that can be done in 2-3 hours, depending your experience and speed. Go grab your hook and yarn to join : )
Pattern Information:
– Skill level: Beginner
– Instructions written in US crochet terms
Measurements:
– Finished size: Small-Medium (Fits head circumference of 56cm approx.)
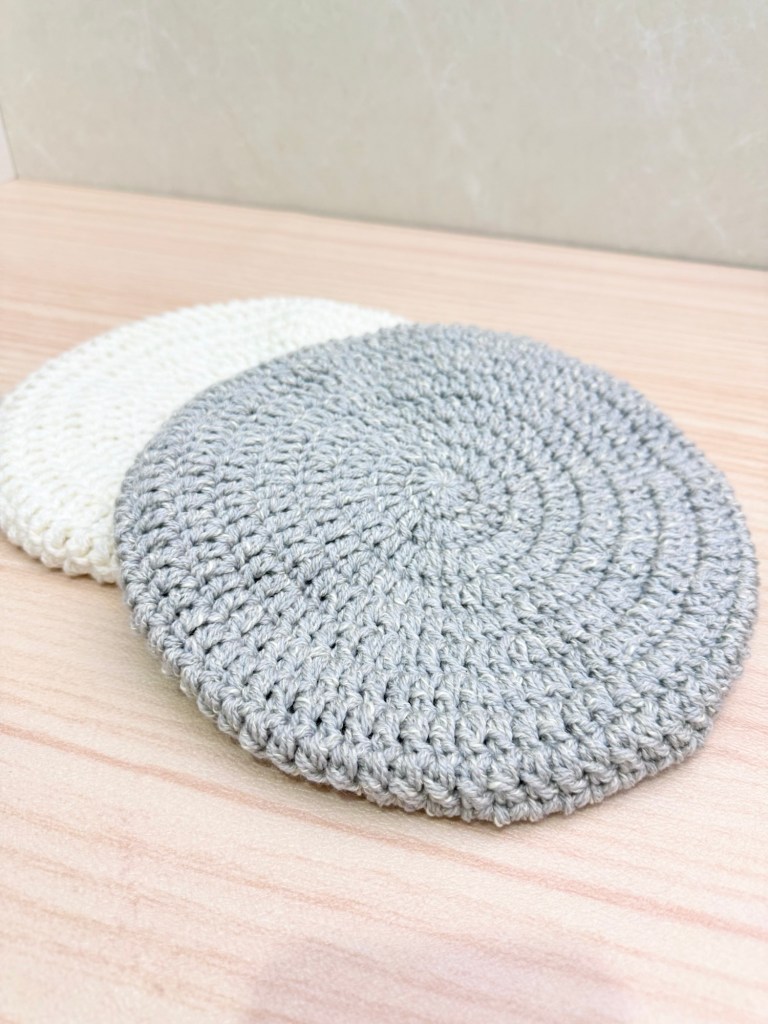
– Even the two berets I made vary in size slightly due to tension differences. However, there is no need to worry as long as your beret falls within the measurements listed in the photos below:


Materials:
– King Cole Cotton Top DK yarn 100g approx. (1 skein)
– 5.0mm crochet hook
– Yarn needle
– Scissors
-Stitch marker
Abbreviations:
ch – Chain
sc – Single crochet
dc – Double crochet
inc – Increase
dec – Decrease
st – Stitch
ss – Slip stitch
<> – Total number of stitches of the round
Pattern Notes:
This pattern is worked with two strands so you may use either DK yarn (double strands) or worsted yarn (single strand) with corresponding crochet hook for substitution. As long as you have a diameter of around 23cm after finishing the 7th round, the beret will turn out in the desired size.
I called for one skein for this pattern since I pull from both ends when working on the beret. However, if you prefer skipping the hassle or avoiding potential risks of dealing with tangled yarn (it happened to me on my flight to Japan lol), you may go with two skeins. For your information, I do have leftover yarn so the amount you need should be under 100g.
Chain 2 is not counted as a stitch in this pattern. You only need to count the single or double crochet stitches when confirming the total number of stitch in each round.
Pattern:
Increase rounds
Round 1: Make a magic ring, Ch 2, 12dc into the magic ring <12>
Round 2: Ch 2, 12 dc inc, ss into 1st dc <24>
Round 3: Ch 2, (1 dc inc, 1 dc) * 12 times, ss into 1st dc <36>
Round 4: Ch 2, (1 dc, 1 dc inc, 1 dc) * 12 times, ss into 1st dc <48>
Round 5: Ch 2, (1 dc inc, 3 dc) * 12 times, ss into 1st dc <60>
Round 6: Ch 2, (2dc, 1 dc inc, 2 dc) * 12 times, ss into 1st dc <72>
Round 7: Ch 2, (1 dc inc, 5 dc) * 12 times, ss into 1st dc <84>
The diameter of your beret should be around 23cm at this point.
Round 8-9: Ch 2, 1 dc in each ss across, ss into 1st dc <84>
(No inc or dec for these two rounds)
Decrease rounds
Round 10: Ch 2, (1 dc dec, 5 dc) * 12 times, ss into 1st dc <72>
Round 11: Ch 2, (2 dc, 1 dc dec, 2 dc) * 12 times, ss into 1st dc <60>
Round 12: Ch 2, (1 dc dec, 3 dc) * 12 times, ss into 1st dc <48>
Round 13: Ch 1, 1 sc in each ss across, ss into 1st sc <48>
Round 14: Ch 1, (2 sc, 1 sc dec, 2 sc)* 12 times, ss into 1st sc <40>
Round 15: Ch 1, 1 sc in each ss across, ss into 1st sc <40>
Finishing
Fasten off.
Weave in all ends.
Tips:
To ensure the appropriate sizing and a more balanced look, you may want to keep a looser tension when doing the single crochet rounds, in order to match with the width per stitch in the double crochet rounds.
After weaving in all ends, gently stretch the beret and give it a shake. It would help loosen up the stitches and fit better when put on.
You may customize your berets by adding detachable bows or ribbons to make it even cuter. I have a few ideas in mind and I’ll share with you on my Instagram account and Threads once finished.
And there you are, you have finished your beret! It works up pretty fast, right?! I’ve already made two in white and grey, as shown in the photos below. I’ll be expanding my beret collection with more colors, maybe burgundy next haha.


I love how simple this pattern is, which is a perfect on-the-go project! I also brought this with me on my Japan trip in April. Since it only requires a skein, it’s not too bulky and I only needed the crochet hook, yarn and one stitch marker. They could easily fit into my crossbody bag, along with my other travel essentials.
If you also have experiences in buying single yarn skeins without a project in mind (if you know, you know haha), this pattern might lift your ‘yarn burden’ and be the reason for you to buy more new pretty yarn in the future haha.
You may check out the tutorial video if you need more information or insight. Please let me know if you have any questions.
I would also love to see your finished berets! Please tag @crochetbymiharin or use the tag #miharincrochet to share them with me!
Thank you for your support and happy crocheting : )


Leave a comment